
I used to teach art lessons.
I miss it.
I took some pictures so that I can give you one.
May I show you?
Please.
My own kids are not ready for painting roses.
They are too hung up on horses, self-portraits, and venus fly traps right now.
(Can you tell which item is my son's favorite to draw?)
It is easier than you think.
I'll show you.
Okay, first we start with whatever it is we want to paint on.

This is a small tray that I base-coated with some milk paint.
To start the roses, I painted the basic form of the rose,
which is kind of like a cloud shape.

I filled it in with white.

I also made a couple of yellow roses,
not rinsing the white off the brush.
The smaller white form,
just a smaller oval, will be a bud.
I filled in with some leaves and greenery.
I tried to make the bigger leaves somewhat rose leaf shape.
I'm not going to be real tight with the details, so this should be fine.

I also painted in the rough forms of some smaller flowers,
baby breath type.
For the pink rose,
I let the white base coat dry so that it would have a background that wouldn't
blend and then disappear when I added the pink.
When it the white was dried, I added some pink in the center...
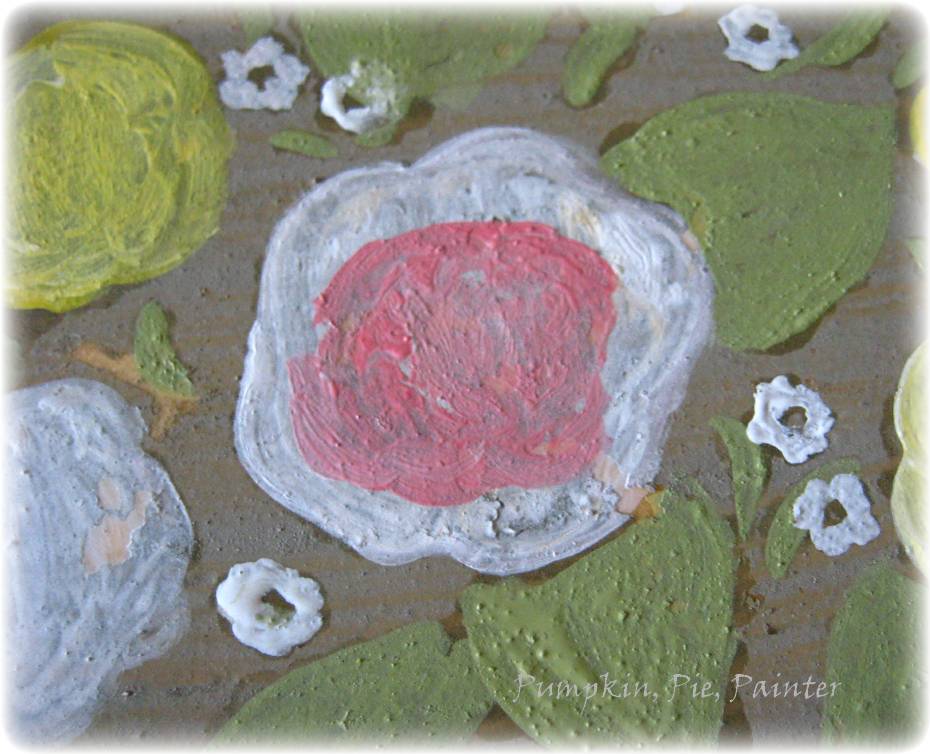
and then added a touch of white on the edges and blended the edge of the pink
with the white edge.

(This picture shows you a pink-painted middle as well as one that has been blended.)

This is going to be an open-faced rose,
so I add two sloppy commas facing each other for the center.
Then I add some more loose commas around them,

getting slightly larger as they go out...

just as rose petals do.

I blended the pink out to the edge of the petals on the outer rim of the rose,...

and then filled my brush with straight red to outline the outside petals.
For a rose that is not fully opened,
making a thicker comma or bowl shape in the middle helps create this illusion.

Lighter yellow petal strips, made from larger comma shapes,
makes the rose look like the light is hitting it from above.
(I did not rinse my brush after painting the pink roses.
This helped connect the two roses, almost like the yellow roses are reflecting the pink ones.
Sometimes shading like this makes the picture more cohesive.

Darker, larger comma-shaped petals on the bottom make the rose look shaded there.
I next loaded my brush with some white
and added little bits of it around the roses,
coming from the direction I had already shaded it for
(shining in from the top).

A light pink rose or white with some splash of color
is made by using white to make the comma shapes on the rose
against the very light pink background.

A bloom is made by simply adding just a touch of pink at the base of the flower.
A white zig-zag going up the flower helps to make it look more like a bud.

Once you have the basic rose skills down,
you can use it with detail,
of loosely, like I did with this mirror.

If a small paintbrush with some slightly watered down paint is used,

a more delicate image may be achieved.
(This table was painted with Annie Sloan's Chalk Paint in Graphite and Arles)
Using a single color, like I did on this table top,
can be a fun alternative to mastering all the colors...

In my next post, I'll finish this painting by giving you a quick tutorial on painting the leaves.

This is how it looks when finished.
(If you are interested, this small tray, the white and black mirror that peaked in on a photo,
and the side table are at my friend's craft sale,
this weekend and next.)
Linking up to:

Gorgeous! Thank you for the lesson!
ReplyDeleteI'm glad you came by for it. :)
DeleteI hereby admit it: I kinda covet your artistic abilities.
ReplyDelete;)
Thank you, Sue! :)
DeleteI wonder who that friend could be ? HeHe.
ReplyDeleteI imagine your things have already sold.
Did you do any gourds this year? I love them
What a wonderful tutorial - thanks so much for sharing!!!
ReplyDeleteGorgeous :)
so pretty!
ReplyDelete