
A nice assortment of textiles is a growing love of mine.

I find they add as much flavor and fun to a photo...

as the item being photographed itself.

As a cook by need as well as interest
and a crafter in random spare moments,
I like to keep my textiles ready to go.
I spied this tired metal stand at the charity store
a few weeks ago for $1.99.
When I came back the following week,
it was still there,
so I grabbed it,
as it had figured its way into my thoughts and plans.
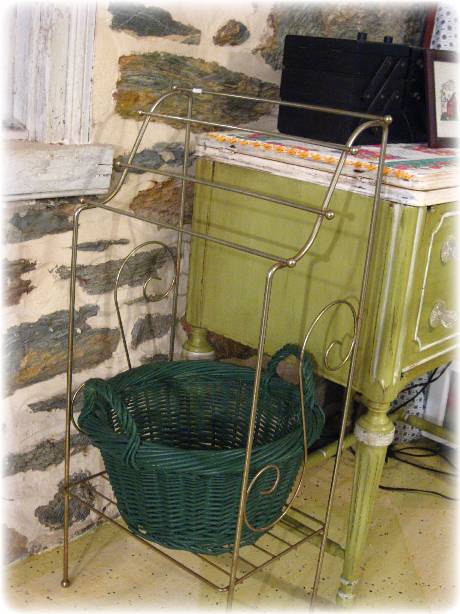
While there, I also found this large $2 basket,
which happened to fit perfectly in the bottom.
Isn't it neat when things like that happen?
I think God was having extra compassion on my tired nerves
as Lillie has been a bit of a beast lately.
A bit.
Terrible Two's were named appropriately in her case.
(Of course, she's still my little action-packed sweetheart).
Wanting to paint the stand and basket
with as little preparation as was possible
I mixed up some home-made chalk paint
that I learned from Sherry at "No Minimalist Here":

(Actually, this is a color I made for some shutters I painted,
but I wanted to show you how it is made.)
I took 1/3 quantity of Plaster Paris
to 2/3 parts paint.

Stirred.

The paint's thickness is clearly seen.
I painted the basket green,
and used a slightly lighter color
on the stand,
just for visual interest.

I waxed both when they were dry,
using more brown wax on the basket
and more clear wax on the stand.

I only painted one coat on them,
and it stuck very well,
giving good coverage.
I love the way it holds my fun pieces
as well as my yarns for crocheting scarves for
hastily advancing Christmas craft sales.

There are some definite advantages to home-made chalk paint,...

but some distinct advantages for Annie Sloane's Chalk Paint.
I will still use her chalk paint for certain projects...

but I'll have to explain the differences in another post.
Both types give a new view on items that I would have
swiftly passed over before.
Don't forget the Great Painted Pumpkin Giveaway is going on now!
I painted these using home-made chalk paint.
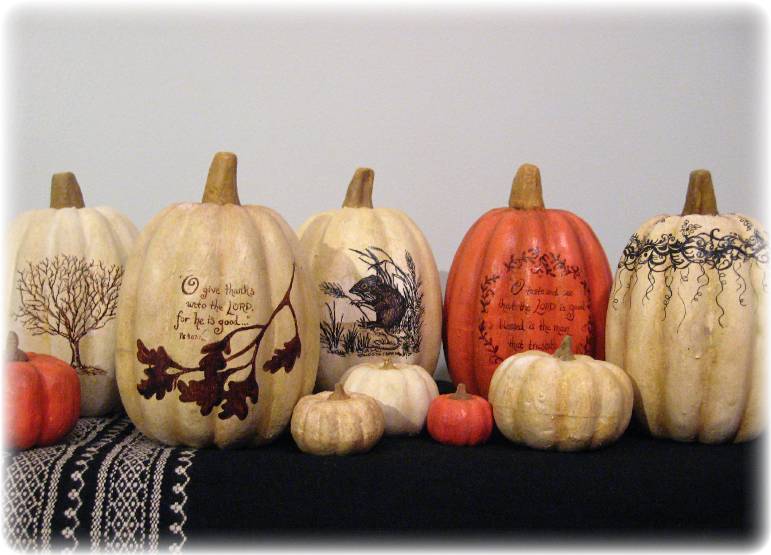
(Notice my new love for textiles being used in this pumpkin scene?)
Linked up to:
Between Naps on the Porch - Metamorphosis Monday
Polly Want A Crafter? - Monday Craft Linky Party
Keeping It Simple - Motivate Me Monday
Skip to My Lou - Made by You Mondays
beyondthepicketfence: under-100-linky-party
nominimalisthere.blogspot.com
firefliesandjellybeans
House of Hepworths
From my Front Porch to Yours
Somewhat Simple
iheartnaptime


I will try your version of chalk paint. I love ASCP but wow is it expensive. I use a lot of whoops paint too, especially in my favorite vintage greens and greys. Loved your post today.
ReplyDelete- Joy
Now she even makes her own paint....
ReplyDeleteSheesh!
;)
PS. You can bet I'll be back for that giveaway!!
Wow, I love that little green piece with the fancy wooden legs...your pumpkins are super cute! andrea@townandprairie
ReplyDeleteWhat a fantastic makeover...I love it.
ReplyDeleteyou are crazy crafty, lady! i do like the shades of green you chose for those pieces (cabinet included).
ReplyDeleteI am definitely going to try the chalk paint! I also love how you displayed all your linens!
ReplyDeleteThanks for stopping by my blog the other day!
~Angela
It's so fun seeing the adventures of chalk paint. I am probably the last one in blog land not to try Annie Sloans or my own! I have to say I love the look of your home made, and your pumpkins are darling!
ReplyDeleteCarol
That is a seriously awesome redo!! Love the stand and the basket - and they're perfect for your "higher" use! Who'd'a thunk it???! Oh you and all the other chalk painters out there are sorely tempting me to break that restraining order against me with regard to paint.... ;o) Smiles & Hugs ~ Robin
ReplyDeleteThanks for sharing your home made chalk paint recipe. I adore your painted pumpkins!
ReplyDeleteLove the color green,and the transformation of the basket and hanger. And the pumpkins are amazing. It was fun being there today seeing you doing them and having fun with the kids.
ReplyDeleteI am so happy the paint recipe worked for you. The little stand is darling with your vintage linens and the basket looks wonderful. Thanks for the mention.
ReplyDeleteHugs,
Sherry
What a cute stand! I am your newest follower.
ReplyDeleteGreat Post!! I have the ingredients to mix up my first batch of chalk paint sitting on my kitchen table...can't wait to give it a try...I never thought of painting metal with it...or baskets!!
ReplyDeleteNice job!!
Denise
So glad I followed Susan's instructions to visit the person before us and after (I'm last right now, so the one before--YOU!). I love the way your stand turned out--great way to display your pretty textiles. I love vintage linens myself, so I was led to yours! Thanks for sharing, and the instructions! My post tonight is a tutorial too! I hope you'll stop by!
ReplyDeleteAwesome! What a great job! Thanks for sharing.
ReplyDeleteHope to see you on my blog:)
Your linen collection is just beautiful! I just started collecting some pieces to display on an old ladder I bought. Love picking through all of the linens at antique stores! I'll be curious to have you describe the differences between the homemade and original chalk paint. It appears the homemade has some texture that doesn't give a smooth paint look? Regardless, your pieces are beautiful!
ReplyDeleteI love this stand, came out so cute! Love the make your own chalk paint too! What a pretty way to display your textiles :)
ReplyDeleteWow! What a wonderful color! It turned out amazing! Thanx for coming to party and have a fabulous weekend!
ReplyDeleteI've never used Chalk Paint before but you've inspired me. This piece is fabulous. And like someone said above Annie Sloan is expensive which is why I haven't ventured into chalk paint yet. Thanks for the inspiration.
ReplyDelete