

I wanted to try out some different stain techniques I read about on blogs
to figure out what I'm going to do on my unfinished kitchen cupboards.
So I thought I'd practice on a wooden piece that I got at the second hand store
(It was $2 because it had a nail hole in the lower right hand middle of it,
so I filled that with wood filler).
I thought I could also share with you how
YOU
can paint this picture for yourself.
It just requires some tracing skills.
Of course, the downside is when somebody raves about your
piece of artwork,
and you have to explain that it's traced,
like the way I had to when my husband said my Father-in-law saw this
and said how wonderful it was...
"Well, I didn't REALLY paint it all on my own..."
(which is why I don't do this much).
Of course, one might not say anything but,
"Well, thank you!"
but the artist in me chides me and won't let me do that.
I won't sign my name to these paintings either.
I don't feel comfortable claiming them as my work.
So anything you see with my name signed on it,
is something I didn't trace.
That being said,
sometimes, to get the look you want,
it's worth it.
It is also helpful
if I have a hard time trying to get the correct shape of something.
Tracing gives a practice and helps me get to know the
actual form
so that next time I feel much more confident about
drawing that creature on my own.
The eye can be deceitful
and we get the shape of things stuck in our mind,
when it is actually much different.
This robin has a much longer/narrower head
than my brain kept telling me.
I now know that when I try to draw robins on my own.
First, I went to The Graphics Fairy
and picked out the image I wanted to use.
I love her site because the images are old ones,
so they are not copy-righted.
This is, of course, ESSENTIAL in remembering
when doing this.
Personal photographs can be used as well.
This is, of course, ESSENTIAL in remembering
when doing this.
Personal photographs can be used as well.
If you find an image you like at The Graphic Fairy
and click on it,
it will enlarge it for you.
After I have picked out the image,
I can either print it up,
scan it back into a program on my computer where I can work on it,
or just alter the size a little on the website.
To alter it and print it up right on the Graphic Fairy's blog try this:
click on the image.
Up in the corner of your computer,
you should see "File"
(Okay, I'm assuming here that all computers look the same;
please inform me if I am wrong: mine is in the upper left corner).
If you click on "File"
and then click on "Print Preview"
it will show you the size you are printing the image
on a 8 1/2" by 11" piece of paper.
Up on the top row,
you can change the percentage that you see,
and this will allow the image to be printed smaller or larger.
Of course, by this method,
you can't print anything larger than an 8 1/2" by 11".
I did mine on a program on my computer,
so I can make it a "banner" and adjust the size to whatever I want it to be.

I decided to change the wording,
so I added text boxes on this page.
(If you don't know how to do this,
you could always just print up the words you like in
a Word program to the size you want,
or just paint your own wording.
I am not good at painting unaided wording,
so I often do my wording this way.)

I actually added 4 different text boxes here:
1 for the "C"
1 for the "heerful"
1 for the "S"
and 1 for the "ong".
This way, I could make the first letters slightly larger.
I also rotated the "heerful" a bit
so that it looks like it's tilted.
I made the letters bold
and also indented.

I then selected each of the textboxes
and pushed this symbol,
which made the letters outlined so I'd use less ink,
and the letters would be easier to trace.

I then cropped the bird picture,
cutting the bottom half off so that just my words remained.
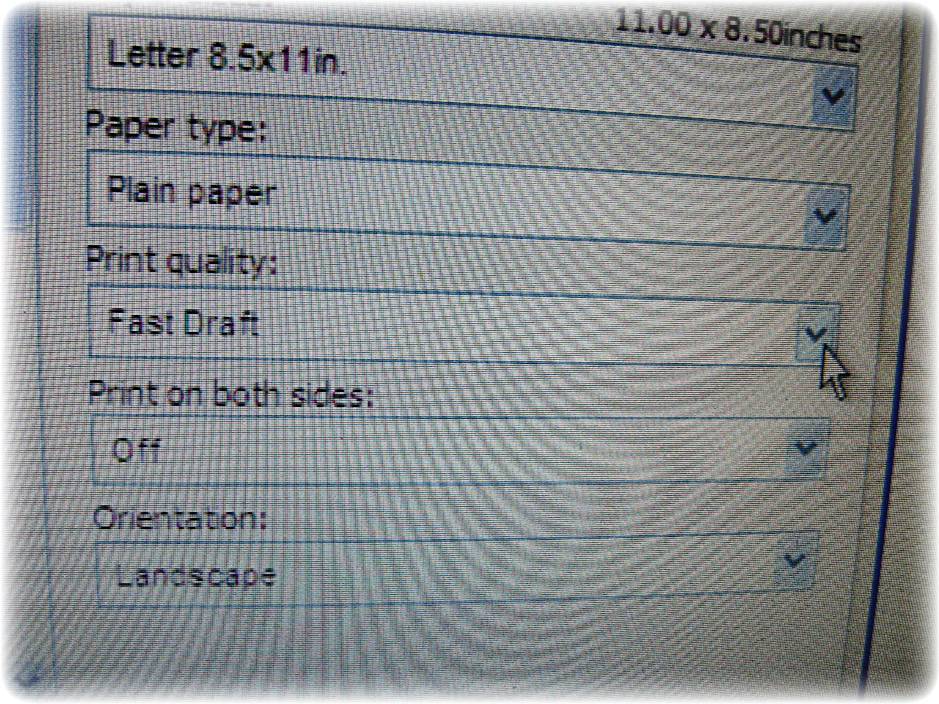
I selected "fast draft" when printing it up,
so it would use less ink as well
(which is essential for me
because I can't always visualize things until I see it
and had to redo the letter a few times
because it was too big or the wrong style print.)

After I had my picture and words to the size
and way I wanted,
I gathered my charcoal pencils...

Cut the image around a little closer so I could see it's placement more easily...

colored charcoal pencil all over the back of the image and lettering...

and then taped it to my board.
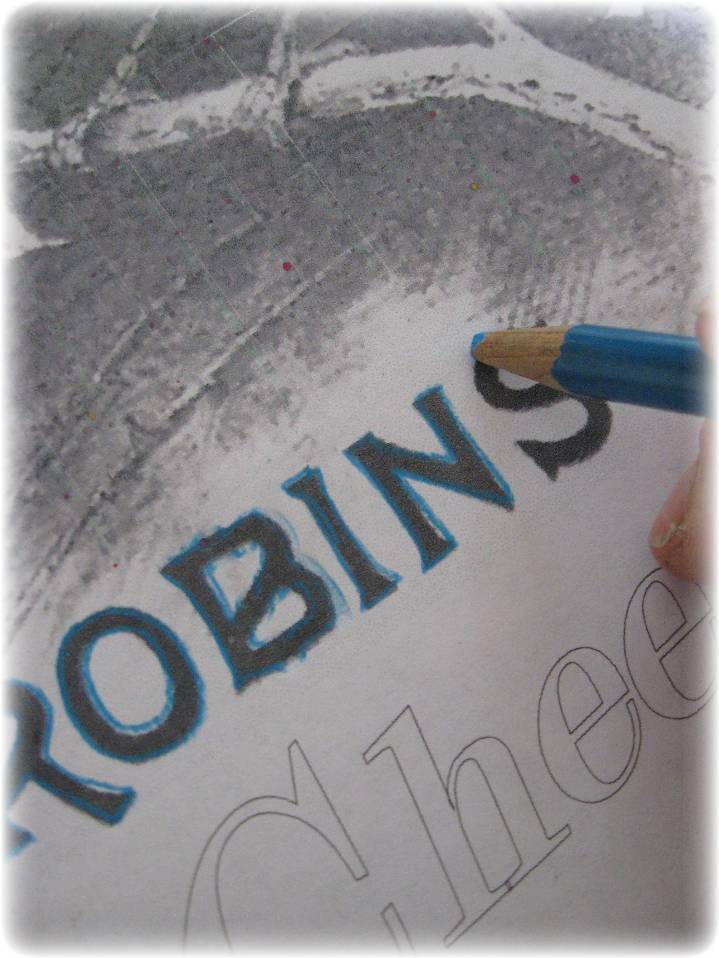
Here is where the tracing comes in.
I just traced all the lettering
and anything I wanted to come through on my board.

I carefully lifted the paper...

and here was the image.
At this point,
I didn't have time to work on anymore,
so I set it in a place that was somewhat safe from
nosey little hands
(Yes, I suppose hands can't be nosy,
but it's the hands that could destroy this charcoal image in one easy swipe.)
So it got put up until the evening when I could concentrate on
trace-painting.
Next time I will show you some painting tips and tricks to finish this,
as well as an easier sample of this same picture
just using it's silhouette.
If you have any questions,
please feel free to ask!
Linked to:


You are so clever!
ReplyDeleteAnd those cupboards are a dream.
=)
I love it! Thanks so much for sharing.
ReplyDeletePam
What a great idea! Thanks for posting this!
ReplyDeleteNow this is my kind of painting!
ReplyDeleteThis is so fantastic! And I have a leftover piece of beadboard I have been trying to figure out what to do with so this would be a great option. I can't wait to see the next part of the project! :-)
ReplyDeleteVanessa
Good job on the detail of explaining. You made me tired just reading what you did. Hope you have a great Easter!
ReplyDeleteI think it's wonderful!!! You did a great job explaining the process, and it looks fabulous. :)
ReplyDeleteThanks for joining my Weekend Bloggy Reading party. Hope you had a lovely Easter! :)