Showing posts with label Give-away. Show all posts

Saturday, February 11, 2012

Beautiful Jewelry and a FANTASTIC Giveaway!!!


I love hand fashioned jewelry.

Isn't this ring beautiful?
(Keep reading if you like it!)

Knowing that something has been crafted
with special attention to details
is so much nicer than a store bought piece.


Recently I crocheted this piece:


It was a pretty simple project.

I found the free pattern through Ravelry.com,
and posted it to my Pinterest board
so that I could keep track of where I found it.


I used some hemp for my version,
which works better if you let is soak in some water for at least 10 minutes

before starting to crochet it.

This makes it easier to work with
and it causes it to dry up nicely,
not being so stiff.

To add some color and interest,
I strung some old beads I had while the string was wet
and before I started to crochet it.
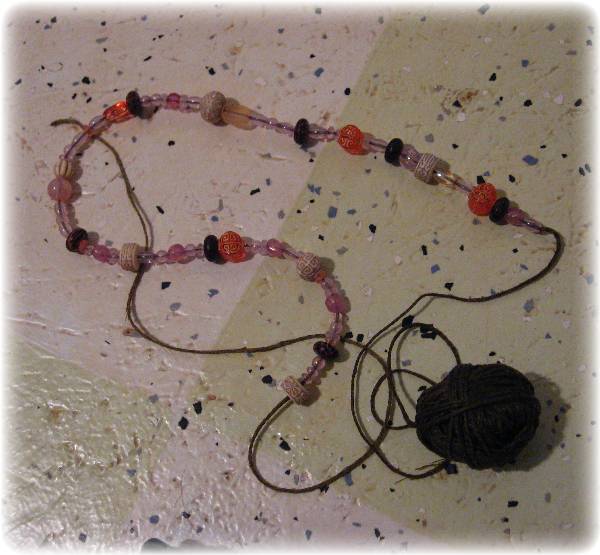
I then crochetted the pattern,
adding a bead about every ten chain stitches or so.
I made my necklace a bit longer than the pattern.

Creating some jewelry like my hemp necklace,
makes me really appreciate the fine work of other jewelers.


I bought my new wedding ring a few months back
from a splendid shop on Etsy
called Form and Function.

Stacy creates beautiful pieces of jewelry,


and was so pleasant to shop from.

I asked if I might advertise her shop on my blog.


All of Stacy's pieces are beautiful.

Stacy has generously offered to give $75 toward her shop
as a giveaway for my blog.


Isn't that a sweet gift!?

If you would like to enter,
you can earn a chance to win three different ways:
1. comment and let me know that you love Stacy's jewelry.
2. Go to Stacy's shop >Form and Function<
and leave a comment telling me which piece of jewelry is your favorite.
3. Announce this giveaway on your blog
or on facebook
and comment here, letting me know that you did.

This giveaway will be open until next Friday,
February 17.

You don't want to miss this sweet experience!


(I have been told some comments are not going through.
If this is the case for you, please "like" my facebook page
and you can put your comments there.
So sorry about this: I'm not sure what is going on).

Monday, January 30, 2012

A Bit of Love


As mentioned in my last post,
here is the instructions of how I made my Valentine's Day banner for my mantel.

If you don't want to know,
but would like a chance to win a banner,
skim down to the bottom of this post.

If you don't care, I will cry profusely for two days.

No, I'm just kidding.


I found this great idea at The Graphics Fairy:


I purchased some old music books at a yard sale this past summer,
so I tore out some pages that were in pretty bad shape anyway,
and glued them to some cardstock to be used for my background triangle flag pieces.


 I got on Pinterest and looked for a "Love"
that I liked
and found this one:
 Pinterest:
from the great website that sells these and other embroidered pieces by Jan Constantine.
(Thanks to a reader for letting me know where this pillow was from!)
.


I printed it four times,
thinking I might only be able to salvage one letter from each printing,

 but I was able to actually save 2 letters from each printing,
so that is how I ended up with two banners.


After I cut the letters out,
I cut a heart shape out,


It was much bigger than I needed,


so I just kept trimming until I got the right size.

I traced the heart pattern onto white cardstock,
one for each letter,
and then glued the letters on.

They all fit nicely,
 except for the "L",
which was acting like my two-year-old Lillie:
not wanting to easily comply according to the rules.
 

I fixed it by cutting out a portion of the bottom line
where the size seemed most consistent
and then glueing it on the heart with that part over lapping
so it looked smaller.

At this point, I applied matte Mod Podge carefully to the hearts with letters.
I have found this seals printed images.
I have had one too many printed things get wet
and the whole project get ruined by smeared printed ink.
The trick is to modge podge with one swipe across the image.
Too many swipes, and the colors on the image will bleed.
 While these were drying, I set them aside.


I laid the heart pattern onto a scrap of paper

and used a ruler to etch a slightly larger banner size I wanted behind each letter.
I folded my rough flag in half lengthwise and trimmed it,
making it exact on both sides.


This pattern was traced onto the music covered cardstock,
making a flag piece for each heart.

I Mod Podged these music-covered flags because the music paper was very fragile
(one had the date 1918 on it).
 
After the hearts with letters were dry,
 I then applied German glass glitter to the edges of the hearts
using a paint brush and Elmers glue,
and sprinkled on the glitter into a plastic container to catch the stray glitter.

 These hearts were then adhered to the music paper flags
using glue.


When everything was dry,
I found some ribbon I liked,
 
 and sewed the flags to it across their tops.
(I had to touch up a few spots where the glitter was too close and got crunched off
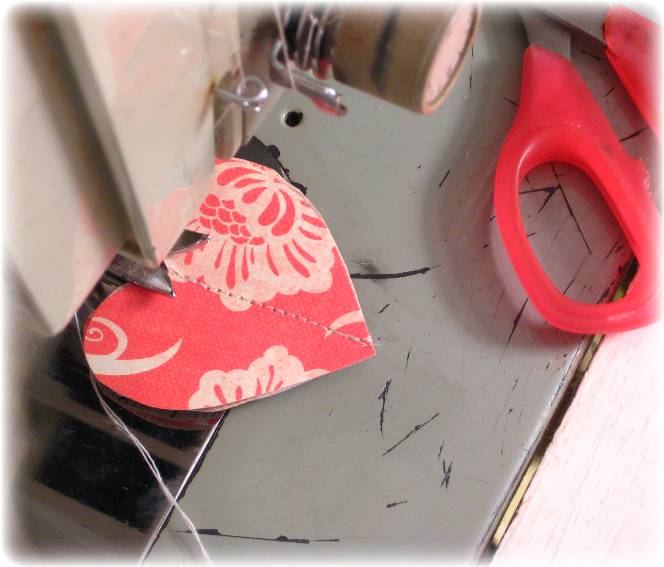
but otherwise, they survived the antiquated sewing machine.)


 I have always wanted to try making these banners;
it was a fun project.
My husband wasn't too sure about the whole idea of the paper banner,
but my daughter had such an enthusiastic response,
she made me feel like it was worth it.
Maybe it's just a girl thing.


This banner looked like a fun idea as well,
but I liked the hearts to stand alone.
 
Pinterest: Cottonandcurls.blogspot.com: Heart-garland


I found some background paper that I liked
graphicsfairy: Wallpaper

and, cutting some scrap-booking paper down to 8 1/2" so it would fit through my printer,

I printed the Graphics Fairy background paper on the back side.


I flipped it, shrunk the print image size
and printed it in the other direction as well,
to better fill the paper up
and for my two sizes of hearts that I wanted to make.
I then painted Mod Podge on the printed background paper.


I also ripped out a few more pagers of the old sheet music
and glued that to the back of another piece of the same red scrap-booking paper.


I cut hearts from all of the two-sided paper,
and then lined them up in groups of three,
some facing all the same direction,
others so that like sides were facing each other.


After painfully trying to find the eye of the needle
(my eyes are not cooperating lately)
I sewed through the middle of the hearts.

I'm a mender of hearts.


The back of the heart looked like this.
Edges were trimmed so they all lined up better.


Separating the heart layers was the last step.


These can be set around just as they are.


 I made this extra grouping below:

they're easy enough to slip into the mail.


If you leave a comment letting me know you would like them,
I will enter your name into a drawing.
I'll pick a name on Wednesday.

This is just a simple giveaway,
so I'm not going to leave it open long.

I'm hoping somebody will prove my husband wrong
and want them in their home.

But he'll say I cheated by saying that.

Now I think I doubled the cheat by adding that part.

I'm going to get myself confused if I keep this up.
I hope these directions weren't as confusing.
You can always ask if you have any questions.

Have a great Monday!

Linking up to:
Graphicsfairy.blogspot.com: Brag-monday
Wearethatfamily: works-for-me Wednesday
Savvysouthernstyle: Wow-us-Wednesdays
Time-warp-wife
Abowlfulloflemons
Aboverubies.net: Domestically-divine-tuesday
Notjustahousewife: Show-me-what-ya-got
Homestoriesatoz.com: Tutorials-tips-link-partyBetweennapsontheporch: Met Monday
House in Roses
Homemaker on a Dime.com
Craftskeepmesane
Bystephanielynn Under the Table and Dreaming: Sunday-showcase-party
Craftskeepmesane: Motivate-me-Monday

Sunday, January 29, 2012

Hearts on My Mantel


Decorating for Valentine's Day isn't something I do a lot of.
I have a few little things,
but usually Christmas has me plumb worn out with the
change-out-the-whole-house-decor,-buy,-shop,-wrap,-
then-get-it-all-changed-back
scenario.

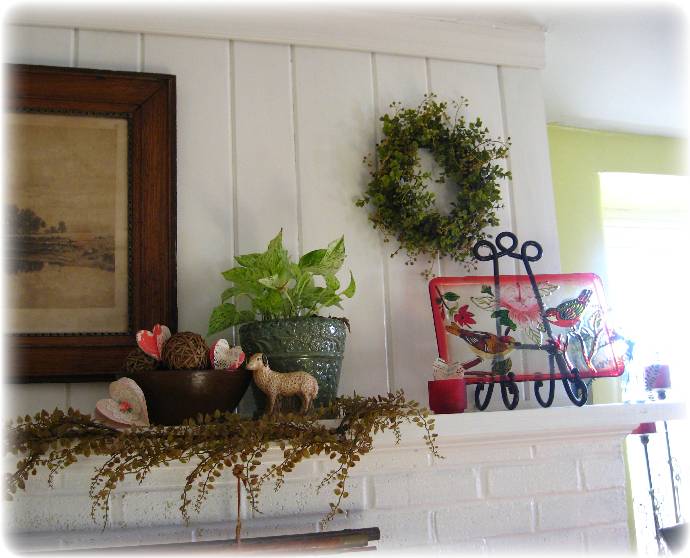
I thought I'd just make a couple little things for my mantel,
so here it is:


My husband gave me this glass bird plaque for Christmas:
isn't it so vibrant and pretty?


He has such good taste.


These are my love-ly creations...

which I will explain tomorrow.
(I made this extra grouping to giveaway,
so come back tomorrow if you are interested).

I also have a fantastic giveaway coming up in the beginning of February.
Stacy, a fabulous creator of jewelry,
made my new wedding ring
and is my first advertiser.

You'll want to be here for her great giveaway!!!

I'm sorry I haven't been much of a writer this week.
It's been a week or two of feeling like I have a lot stewing up there in the brain,
but it's not coming out.

I've been working on house projects while it's winter,
so maybe the paint fumes have gone to my head.

That or I'm drinking too much hot chocolate.

Is that possible?


I hope you have a restful Sunday!


"I will praise thee, O Lord,
among the people:
I will sing unto thee among the nations.
For thy mercy is great unto the heavens,
and thy truth unto the clouds."
Psalm 56:9-10


Linking up to:
Homestories A to Z.com: Valentines-mantel-link-party
Abowlfulloflemons
Aboverubies.net: Domestically-divine-tuesday
A Stroll Thru Life: Table-top-Tuesday
Betweennapsontheporch: Met Monday
Funky junk interiors.blogspot: SNS
House in Roses
Homemaker on a Dime.com
Craftskeepmesane
Bystephanielynn Under the Table and Dreaming: Sunday-showcase-party
Craftskeepmesane: Motivate-me-Monday

(Thanks for your help in letting me know you could see the advertisement.
I was having a hard time getting it up, but I think it's fixed now.)


Friday, December 2, 2011

From the Back of the Barn...


There's nothing like finding an old piece of furniture in a attic,
basement,
or as in my case,
in our barn.

There is the mystery of where it has been
and why it was allowed to be tossed aside.
My Farmer tried to convince me that this piece was better left where it was,
and I pretty much agreed with him
until we got the back porch enclosed
and I knew this piece would look perfect out there.

I hoped that underneath the bird stuff,
years' conglomeration of spider webs,
and repulsive bat droppings,
there might be something there.


Well, let's just say it was a big hope. 
It ended up I had to rip the whole back off of it. 
It was so horrible:
I just could not get it clean.


My Farmer was called upon to attach a new back for me.
He also ended up having to put new side pieces to hold the doors, 
and it was quite a job for him to get it all in working order so that the doors would close right and latch up, and the whole thing wouldn't sway and bow in the process. 
  He wanted to quit on this thing more times than I should tell
  and I felt a twinge of guilt for not letting him.


But he kept at it.
There's something about investing a few hours of time
that makes it hard to give up on something.
 And I knew he could fix it.  


Having a stone house limits what you can hang on the exterior walls;
many of the inside walls are plaster, crumbling easily under very little weight.
So we decided to use another piece of furniture as a base.
(Please, excuse the mess in the midst of getting it ready).
I bought this at a yard sale for a small price:
it was missing the bottom two drawers.

I began by painting the outside with Slate Black Annie Sloane Chalk paint
and the inside with a her Provence.
Since I was only using this as a base coat so I wouldn't have to sand it,
I used a very small amount, needing only one coat.
Then I painted everything with a flat white paint
and waxed it with clear Fiddes and Sons wax.

The next problem that arose was how to attach the two pieces together,
since the wall where we planned to put it was stone.

It sat in the basement for a few weeks
as other things popped up,
but then I sold my school cupboard because it's colors did not work well
with the color of the floor where it ended up.

I suddenly needed the space.

So my husband improvised with this idea:
 (I know, it looks a bit awkward,
and there's an obvious hint that it was a board from the barn,
but I try to limit my complaints.)

I really had no idea what in the world he was going to do to make 
it all stay together,
but he bolted in through the top
and then...
up through the bottom
with what looked to me like gate bolts.

Maybe?
All I know is they look like they'd hold in a tornado.

(The two pieces are beat up enough that I didn't mind what he did
as long as he could get them together.)

And they did.

I now had a great storage place for my supplies and books
for the kids' school.

Decorating it with some fresh greens seemed a fun idea
since it's the Christmas season.


In the morning,
I sewed up the skirt to hide the school mess.


I love having a better place to store my teacups
and some of my sewing things
since my sewing machine sits out in this room now, too.


My husband's solution to hide the wooden block
is for me to paint it to look like a book.

I have to tell you,
I was pretty impressed with him coming up with this solution.
I think all this renovation type stuff is making him pretty creative.


Now, the question is,
what book should I make?
I came up with the possibility of painting it to look like the book
that we read together when we were dating.

(I was working on crafts for a sale when we first met,
and I chose this book for him to read
to sort of break the ice.)

So, here's what I'm going to do:
if you leave your guess
(just one guess per person, please)
at what book it was that we read,
the first person that guesses it
I will send this gourd ornament that I painted.


I spent a lot of time on this one
and got the idea from this beautiful Christmas card
illustrated by Rob Fathers.

I'll throw in a scarf I made as well
since I have a few left from the craft sales.

If nobody comes up with a correct guess
(as that's a good possibility since even my Farmer didn't remember
and probably would never have guessed it),
I'll just randomly pick a number from the comments that you leave.