Showing posts with label Christmas Craft Sale. Show all posts

Monday, December 3, 2012

How to Paint Pinecones


Greetings, friends!

I thought I'd throw in this quick post on how to paint pinecones,
or, at least, some easy whimsical pinecones I think are fun to make.


I have really enjoyed using Martha Stewart's all-purpose paints
because the squeeze bottles and fine tip make them super easy to draw/paint with.
These little bottles have lasted me through a lot of projects, too.
They stick well to wood or glass, and I even found that they can be stained over.


First I start with a stem
and then the top of the pinecone is a fat "M".


(I just paint the "M" and then go back over it and spread it out some).


I then put a few dashes under the "M",
just enough to line up under it.


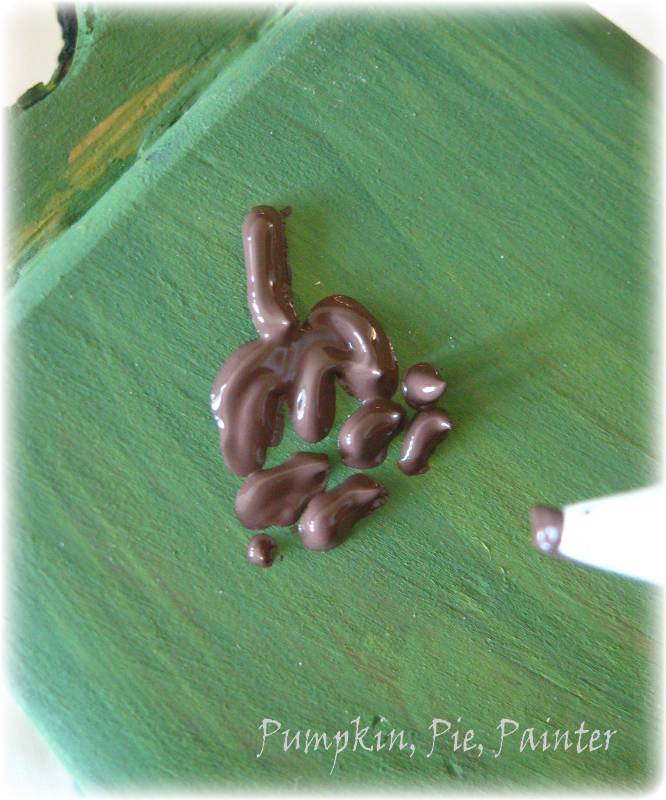
Another row of dots and dashes
(I try to stagger them under the first row).


And then another row.


I want to start making it narrow a little,
so the next row is just two dashes.


A dash and a dot.


A slightly longer dash finishes off the bottom.


There isn't a set number of dashes and dots.
Variety makes the pinecones look more natural,
well,
as natural as a whimsical pinecone can be.


Some random green lines at the top make pine needles.


I then use another color green to make some more needles,
to add a dimensional look to them.

I used a glitter green for the accent needles.


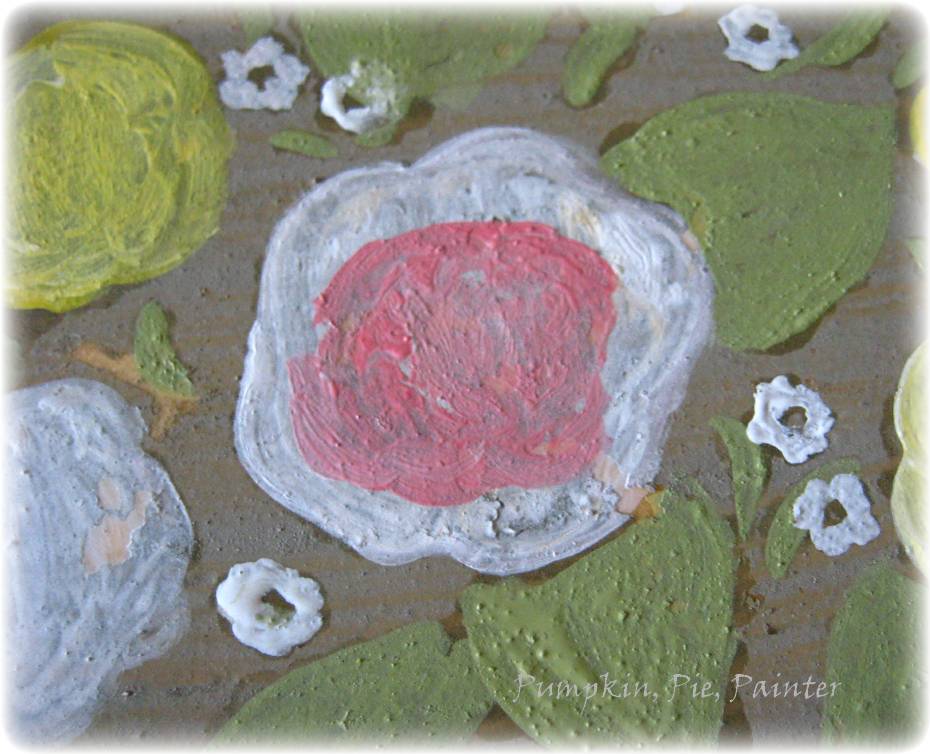
I love adding these pinecones to Christmas ornaments.


So, what do you think?
Do you think a few dots and dashes are ready to become pinecones in your life?


Friday, November 30, 2012

At the Craft Shows...


An open house Christmas craft sale:

my friend does this every year.


She empties her house of her furniture
and sets up shelving and displays.
She creates things to sell and lets her friends sell from her home
(The above picture was of her friend's things to sell.  My friend paints a lot of the rustic furniture
and signs and things you see in the following pictures or at her BLOG.)


We've been friends since we were teenagers;
she is one of the few friends I have had through most of my life that I've stayed in touch with
since the day we met who has also kept the faith.
But it seems we've been crafting and painting for about as long as we've been friends.

She started a blog around when I did,
so we enjoy sharing in that experience,
emailng helpful ideas and encouragement.

It is a grand thing to have such a friend!


However, as I've worked on things to sell this fall,
I have questioned whether this is something I should let go of.

I am almost 40, and something about this birthday has made me look at myself...
what it is I want to accomplish in life,
what are my real goals,
praying for God to show me what He wants me to pursue and do with the next phase of my life.

Introspection seemed necessary;
life has varying stages, and I found this stage very hard for some reason.

Home-schooling has been much more demanding this year
and I don't want to feel so stressed with trying to be with me kids,
enjoy them,
and then work so hard on things to sell.


I enjoy making things to sell and feel good about contributing to the family purse.

But there comes a time when you have kids that are so needy of your attention and time
that the financial contributions seem to be teetering on the scale of what is most important.
I find that my kids need me more now at this school age,
much more so than they did when they were babies
because they need me as a person, somebody to talk to and interact with them;
they need to know I am really here for them with my heart,
and I don't want to miss that buried under a pile of pots of paint.


It is hard to let something you love go,
especially when you've put years into it.


The first week my friend was open,
things didn't go well this year.

Items weren't selling.
People weren't coming quite as much as usual.


I have to admit,
as much as I know I need to let this go,
it is hard when you've invested so many hours into something
and you wonder if you're going to make anything for the sacrifice you have made,
especially when the sacrifice has seemed so high this time around.


I had a goal this year,
as I do every year.

My husband gave me money for a new camera for my anniversary gift
because he knew how much I really wanted one.


It is a nice camera, one I never dreamed I'd ever own.

I hope to use it for a lot of things in the future.

But my goal for the craft sales this Christmas
was to make the money we had used to buy the camera.


With home-schooling taking up so much of my time, this seemed like a pretty large goal;
but I wanted to use up a lot of the supplies I had waiting in the attic
since I knew that this might be the last year I would put this much into the craft sales,
at least for the years to come that I need to have my attention here, in my home.


I tried to not let it bother me.

"It's Yours, God," I prayed.
"I'm willing to let this go and do whatever it is You show me I need to do.
Just show me what that is.
If this is your way of showing me it more directly,
I admit it will be hard, but I'll deal with it."


On the last day of her open house,
my friend sent me an email in the evening.

"This was one amazing Day! We had over 100 people come through today--which is a high for us.We had a record high of sales for one day today. We made more today than we did the last 7 days!"

She told me my total earnings.

It was 4 times what she had told me 2 days before.
My sales at both her sale and the other open house I had crafts in
would make the goal of the money for the camera.


 I have heard people question the reality of God.

Certainly creation shouts his praise
and the Bible spells out His story.

But sometimes, in the little details of our lives,
the small trials we face, the questions that invade the little spaces of our moments
and pursuits,
when the face of God appears through the fog and you hear His whisper in
to the quiet recesses of the soul,
to those places that weigh heavy but very few people even know they are there,


it is these peculiar treasures that invite the realization of His intimate care.

The Grandest of fine artists feels the joy of creation, the mixture of the hues,
the satisfaction of feeling that the work done is a worthy effort,

and He cares.


Linking Up to:
Missmustardseed.com
Tatertotsandjello
FunkyjunkinteriorsHomespunhappenings
alittleknickknack.com
Gnowfglins

Tuesday, November 27, 2012

Home-made Snowman in a Snowglobe.


Home-made snowglobes are such a fun idea.
Have you seen them?


Such a festive idea!

I decided to make some to sell for the Christmas craft sale this year,
but I wanted some snowmen in mine.

I started out by cutting a cardboard base
a bit smaller than the lid of the jar.


 I then found some old material from a shirt I didn't want
and cut it into a piece,
folded it under,
and hot-glued it to the cardboard base.


It was lumpy, but I just wanted to make sure that there weren't any loose ends up,
so it would look like a snowy landscape...

eventually.


For my snowman,
I took a small piece of material,
put a strip of hot-glue on the edge and rolled it up.


Because he looked a bit too tall, I cut him down to the size I wanted.
(Sorry about my hands.  I was working on several of these at different stages at the same time;
I think I have crafting ADD).


I then hot glued the "snowman" to the "snowy landscape."


 Mixing about 2 parts paint
to 1 part plaster of Paris (slightly more of this til I got the consistency I wanted)
I painted this thickly onto the whole thing.


 It was then allowed to dry a day or two.


 This is how it looked from the side.


I then added the face, buttons,
and a scarf (although this guy didn't get one;
on some I added yard scarves, so maybe he was one of the warmer snowmen).


I had found a bag of train landscape trees at the charity store
(one never knows what will turn up there),
so I painted them with the same paint/plaster of Paris mix
when I was doing the snowmen,
so that they would be dry and ready for use as well.


Using some plumber's repair putty (Loctite),
as I had on my sewing machine and my chair,

I broke off pieces and kneaded them up to use as a bonding substance...


to hold the trees and fencing
(also train landscaping pieces from the charity store)
in place.
I find that this works best at really hold well;
the glues that I have tried never seem to hold things in place well,
and this putty sets up really quickly.


After the putty dried, I painted it with white paint,
and I then glued on some clear glass glitter.

The snowscapes can then be placed in the lid
with some artificial snow or even some epsom salts.

I sent all my jar snowglobes to the craft shop,
but I did make one for myself using an old cheese dome
and a wooden bowl I painted up.


I set it on the kitchen table when it was done,
and it was fun seeing the kids' reaction to it when they came down for breakfast the next morning.


Who doesn't love seeing a happy snowman in a world of white?


Tip Junkie

Friday, November 16, 2012

How to Paint Roses.


I used to teach art lessons.
I miss it.

I took some pictures so that I can give you one.
May I show you?

Please.


My own kids are not ready for painting roses.
They are too hung up on horses, self-portraits, and venus fly traps right now.
(Can you tell which item is my son's favorite to draw?)

It is easier than you think.
I'll show you.

Okay, first we start with whatever it is we want to paint on.


This is a small tray that I base-coated with some milk paint.

To start the roses, I painted the basic form of the rose,
which is kind of like a cloud shape.


I filled it in with white.


 I also made a couple of yellow roses,
not rinsing the white off the brush.

The smaller white form,
just a smaller oval, will be a bud.


 I filled in with some leaves and greenery.

I tried to make the bigger leaves somewhat rose leaf shape.
I'm not going to be real tight with the details, so this should be fine.
 I also painted in the rough forms of some smaller flowers,
baby breath type.


 For the pink rose,
I let the white base coat dry so that it would have a background that wouldn't
blend and then disappear when I added the pink.

When it the white was dried, I added some pink in the center...


 and then added a touch of white on the edges and blended the edge of the pink
with the white edge.

(This picture shows you a pink-painted middle as well as one that has been blended.)


This is going to be an open-faced rose,
so I add two sloppy commas facing each other for the center.

 Then I add some more loose commas around them,

  
getting slightly larger as they go out...


just as rose petals do.


I blended the pink out to the edge of the petals on the outer rim of the rose,...


and then filled my brush with straight red to outline the outside petals.


For a rose that is not fully opened,
making a thicker comma or bowl shape in the middle helps create this illusion.


Lighter yellow petal strips, made from larger comma shapes,
makes the rose look like the light is hitting it from above.
(I did not rinse my brush after painting the pink roses.
This helped connect the two roses, almost like the yellow roses are reflecting the pink ones.
Sometimes shading like this makes the picture more cohesive.


Darker, larger comma-shaped petals on the bottom make the rose look shaded there.


  I next loaded my brush with some white
and added little bits of it around the roses,
coming from the direction I had already shaded it for
(shining in from the top).


A light pink rose or white with some splash of color
is made by using white to make the comma shapes on the rose
against the very light pink background.


A bloom is made by simply adding just a touch of pink at the base of the flower.
A white zig-zag going up the flower helps to make it look more like a bud.


Once you have the basic rose skills down,
you can use it with detail,
of loosely, like I did with this mirror.


If a small paintbrush with some slightly watered down paint is used,

 a more delicate image may be achieved.
 (This table was painted with Annie Sloan's Chalk Paint in Graphite and Arles)


Using a single color, like I did on this table top,
can be a fun alternative to mastering all the colors...


In my next post, I'll finish this painting by giving you a quick tutorial on painting the leaves.

This is how it looks when finished.


(If you are interested, this small tray, the white and black mirror that peaked in on a photo,
and the side table are at my friend's craft sale,
this weekend and next.)


Linking up to:


Tip Junkie